Nike WHQ Workstations
Design Engineering for all parts and assemblies, Quality Control. Design and renders by Ben Hopkins.

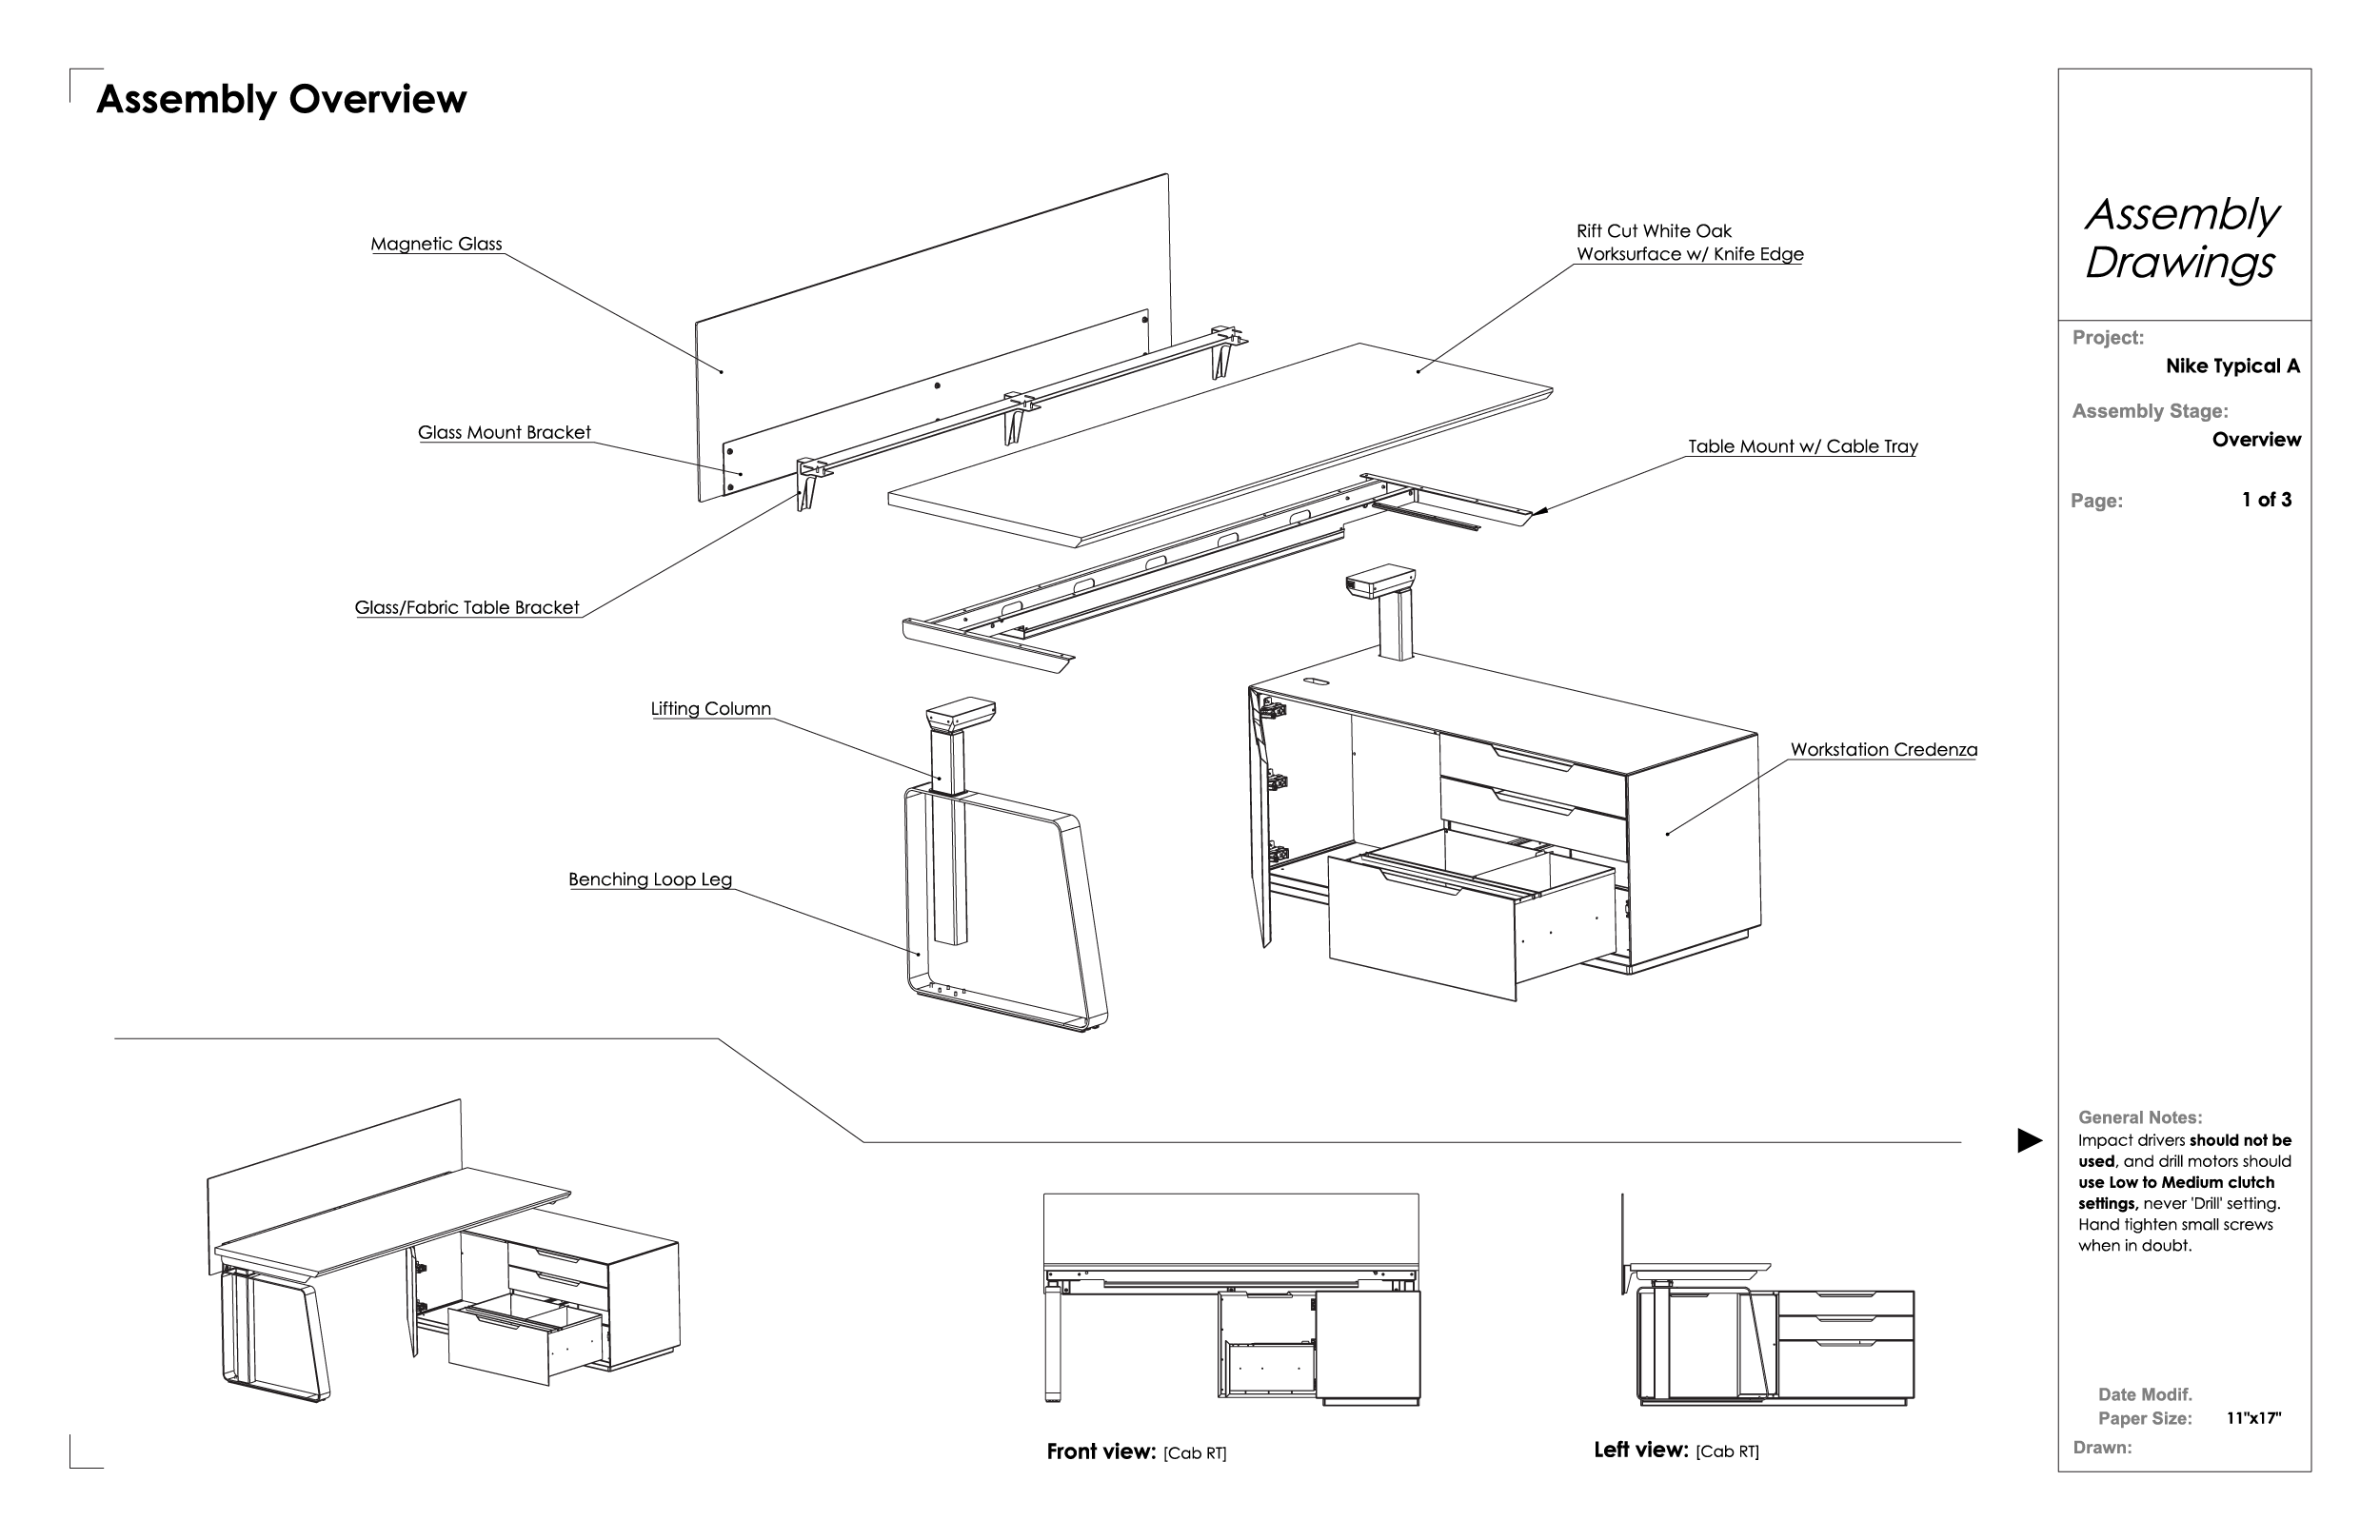
Assembly Steps
-
1. Insert Lift Columns into Loop Leg and Workstation Credenza
a. Glue grommets in to Lifting Column cutouts on the loop leg and credenza. Tape down grommets while glue sets. Do not insert Lifting Columns until glue is fully cured. 2x G Grommet for Lifting Column
b. Insert Lifting Columns and screw down using
Ensure head of Lifting Column points inward towards middle of table.
Recommend placing front and rear face of legs on raised surface to into base of loop leg. install Lifting Columns. Then install ax Screw M6 x 1 'mm lx @1/4-20 Leveler, 1" stud
-
2. Screw Table Mount to Lifting Columns a. Place Table Mounts on heads of lifting columns.
Screw in using D 8x Screw M6 x 8mm (4 per lifting column)
-
3. Screw Glass/Fabric Bracket to Worksurface
a. Bracket will cup the edge of the worksurface (side opposite the knife edge). Screw in to the edge of the worksurfaces using B holes are countersunk. 6x B Screw #8 x 1.5", Countersink
b. Continue to screw Bracket in to the underside of the table with A 6x A Screw x I, Combo Washer Head
-
Item description
Assemblies, Solidworks


Design and Renders by Ben Hopkins.


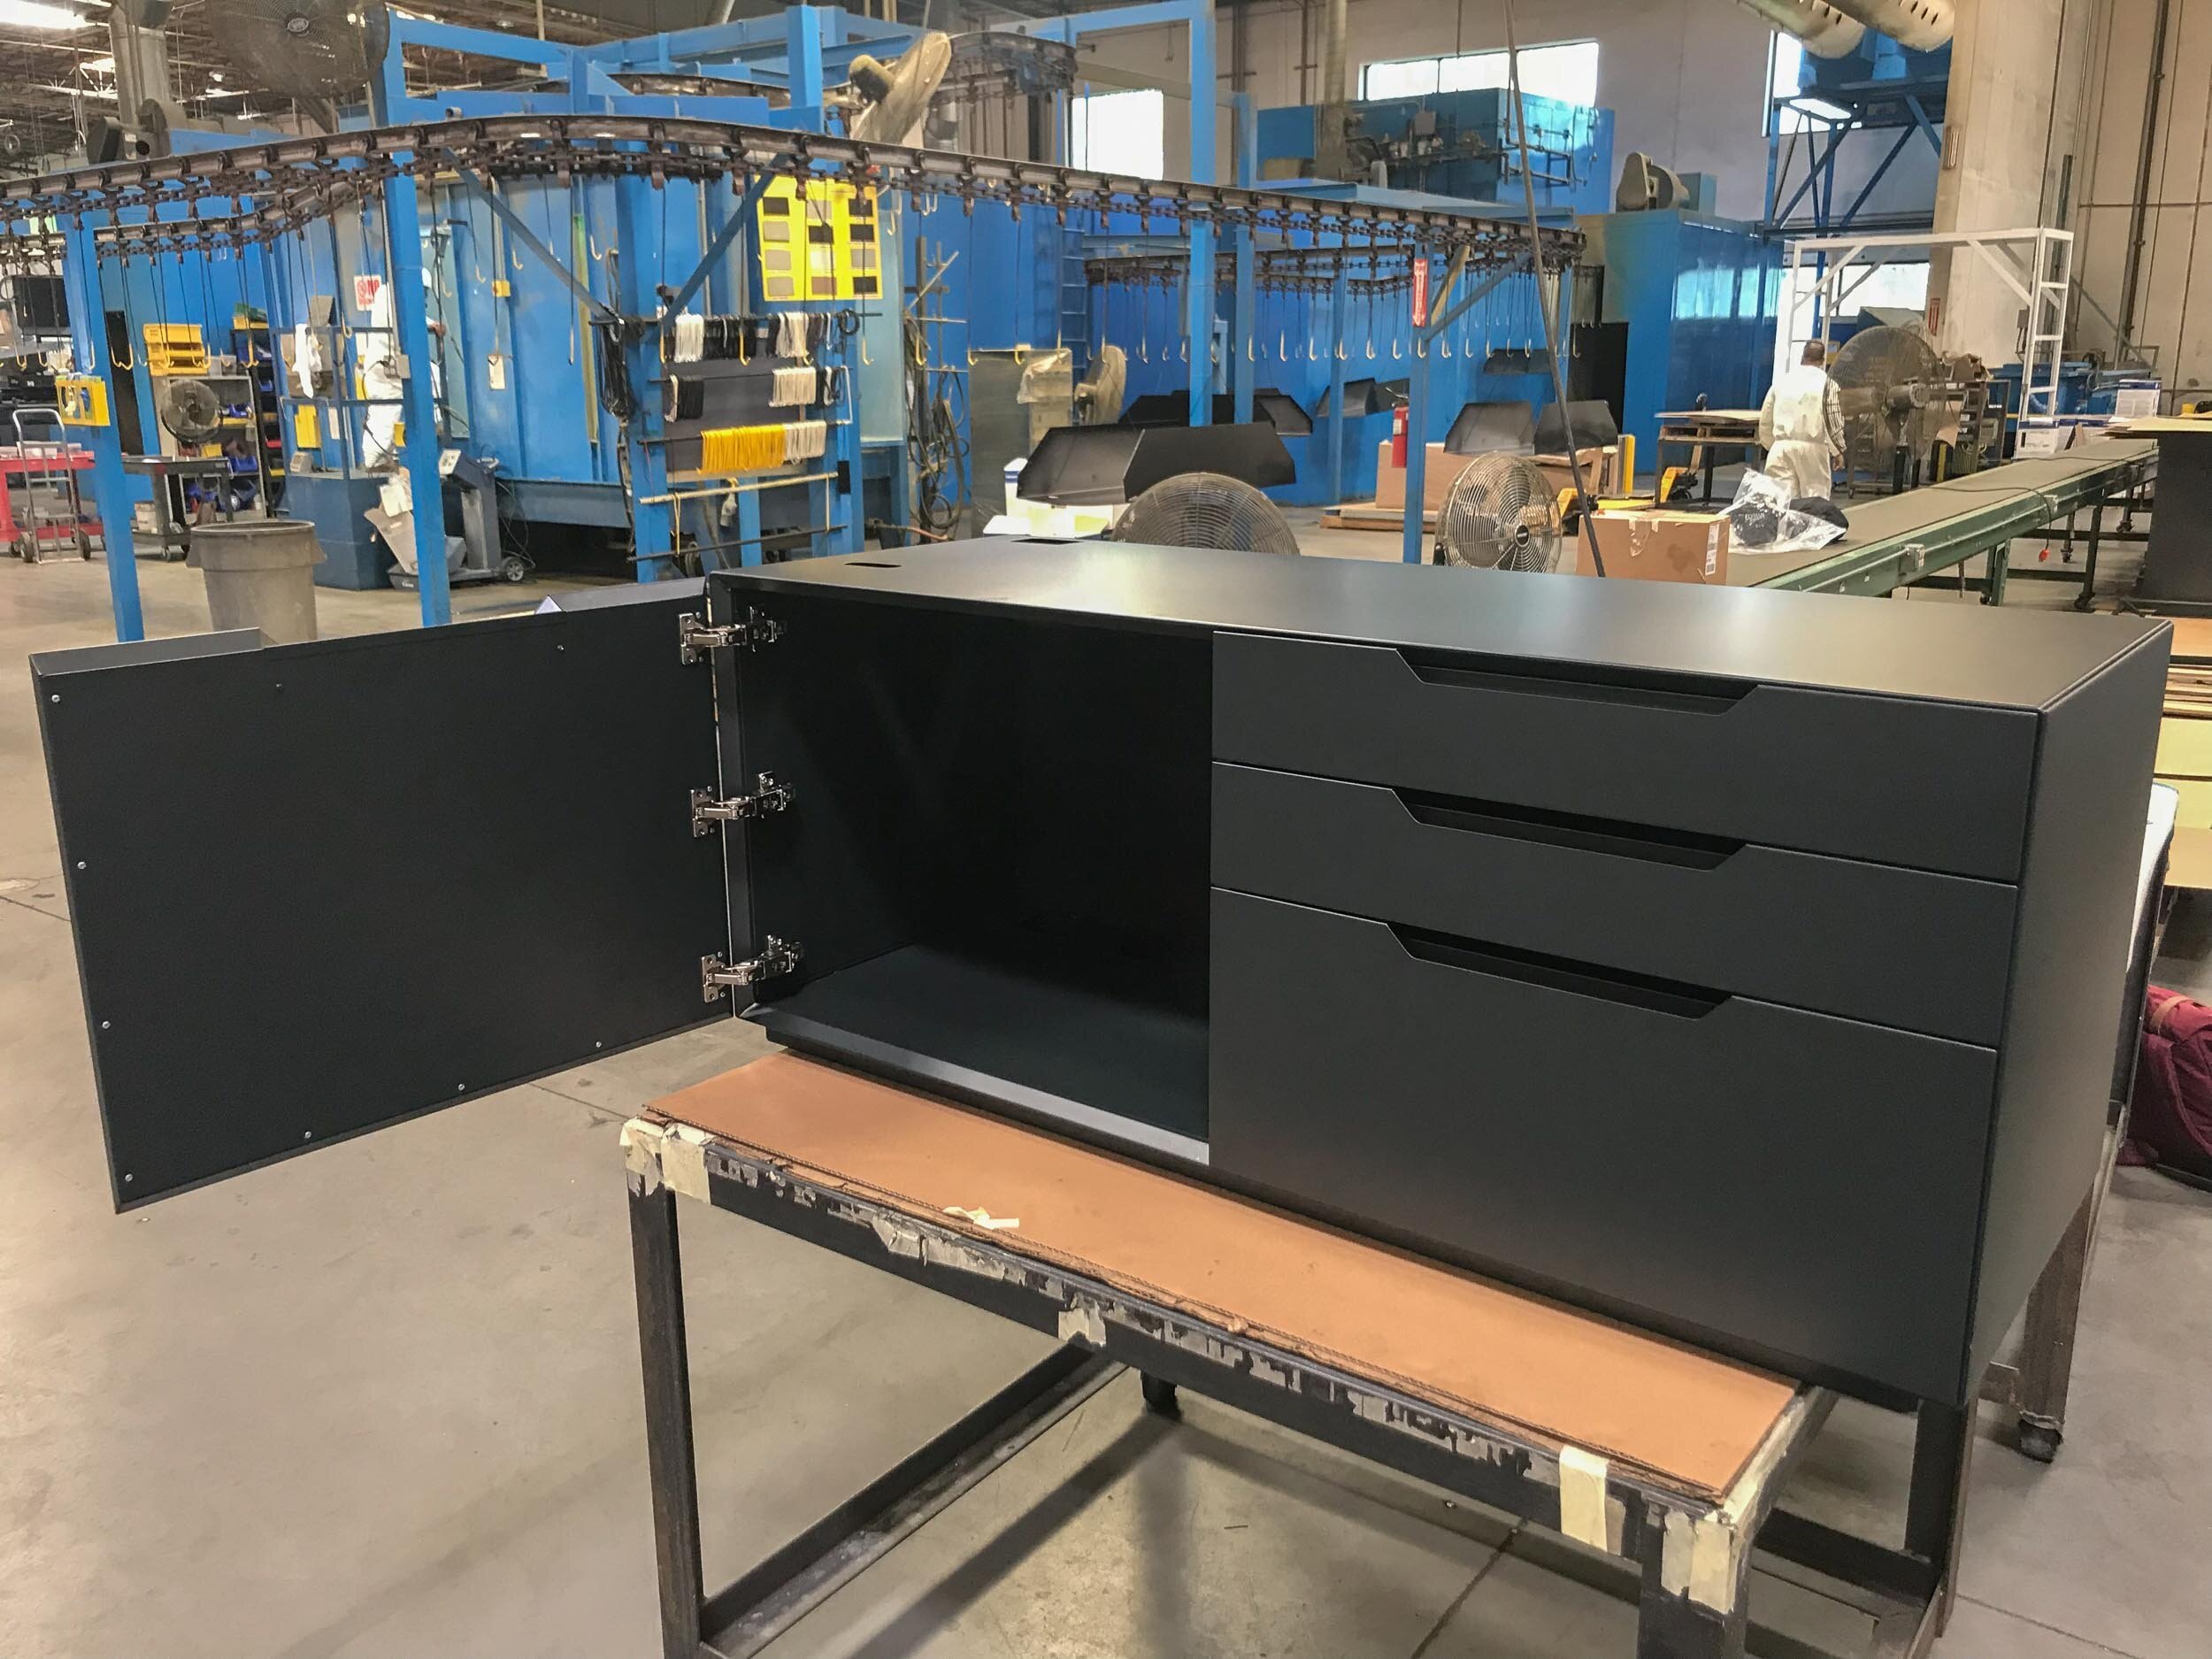
Prototyping and Process


Steel Plans, Solidworks